Setting up Windows Live Mail with DNS Exit Outgoing Mail Relay
|
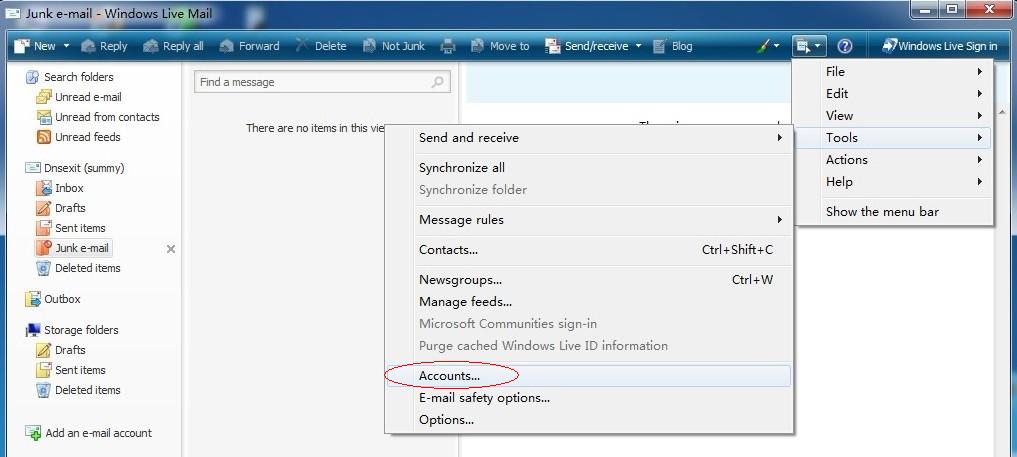
Windows Live Mail - SMTP Authentication Configuration for Mail Relay Outboud Service To assist our users in using our Mail Relay Outgoing service, this document describe the procedures on how to configure Windows Live Mail - SMTP Authentication Configuration to work with the service at DnsExit.com. 1. Open Windows Live Mail 2. From the Tools menu select Accounts...
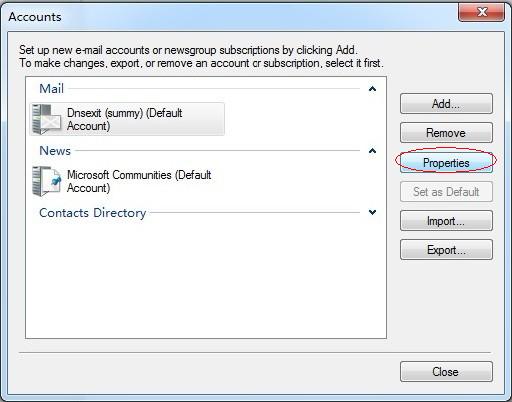
3. In the Internet Accounts window, highlight the your e-mail account and select Properties
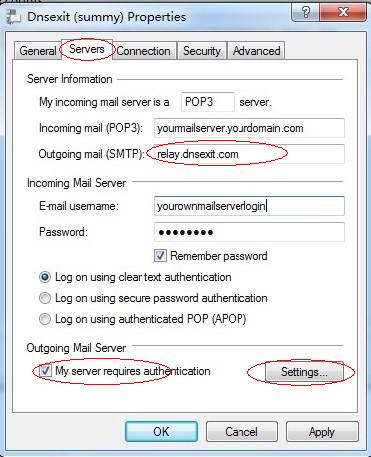
4. In the new window select the Servers tab change Outgoing mail (SMTP) to relay.dnsexit.com and check My server requires authentication
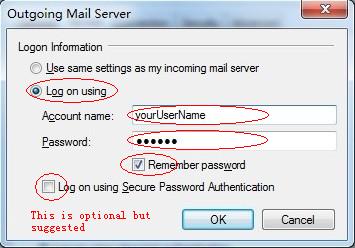
5. Click on Settings button to bring up Outgoing Mail Server Accout setup window. Check on Log on using and enter your account login name and password. Check the Remember password so thay you won't be asked for login repeatly. The Log on using Secure Password Authentication is optional but suggested.
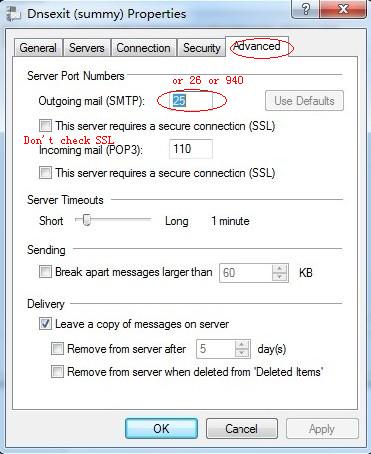
6. Under the step 4 window, select the Advanced tab and make
the following changes: 6. Click OK
|
Ready for better email delivery? Try Mail Relay free for as long as you like:
|